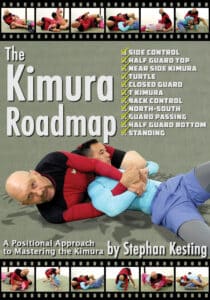
Your Guide to Using the Kimura to Control and Submit Your Opponent from Every Position!

The Kimura is one of the most important submissions in all of jiu-jitsu. In both gi and no gi the Kimura is consistently one of the highest percentage submissions you can use.
To master the Kimura you need to approach it as a position first and a submission second!
Let’s talk about what that means…
The traditional way to teach submissions – including the Kimura – is as isolated techniques. Here are the steps that you do to finish this attack from side control… here’s a move you do from the guard… and so on. And that’s useful, but it has strong limitations. One powerful bridge, one desperate thrash, and your opponent is out of your grasp and scrambling to put you in a terrible position.
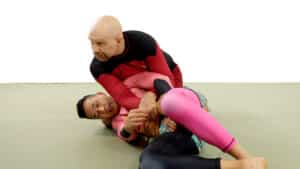
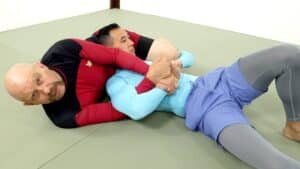
The most important thing when it comes to the Kimura is staying in control of the action. Think of locking on the Kimura the same you’d think of having your opponent in the mount. He’s not going anywhere, and if it takes longer to actually finish the submission, no problem. You have all the time in the world to get the tap.
A control-based approach makes it so much harder for your opponent to thrash and flail his way out of your attack. You keep him in place while you methodically break through his defences and work for the finish.
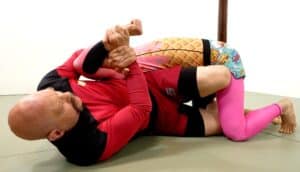
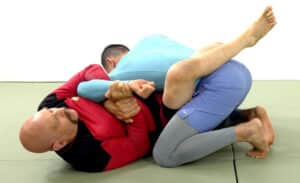
Even more exciting is using your newfound submission control to upgrade your position!
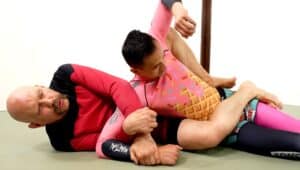
For example, you might use the Kimura from the bottom of half guard to sweep your opponent and get to top side control or even the back. There are a ton of transitions I can show you like this that score points, put pressure on your opponent, and make the Kimura finish even more powerful.
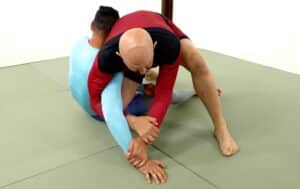
Training the Kimura as a position means you’ll have an answer for everything that your opponent tries to do. This keeps you safer on the mats and cuts down on those frantic energy-draining scrambles. Using the Kimura as a giant handle gives you a lever to move even the largest opponent. And this approach also gives you the time and mental bandwidth to systematically dismantle his defenses, no matter how he tries to hide his arm.
The Kimura Roadmap brings the positional approach to the Kimura armlock. This 12 volume, 6 hour instructional covers all Kimura positions you need to control a live opponent, sweep him, take his back, move into chokes, or finish the Kimura armlock itself.
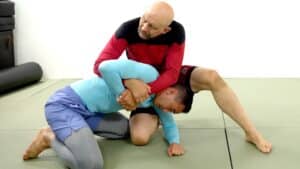
The core of this instructional is a series of step-by-step gameplans to lock your opponent in place, move him into even worse positions, and tap him out at will.
The paradox is that emphasizing position over submission leads to MORE submissions in the long run, not less!
Together we are going to make you MUCH better at the Kimura and add a whole new dimension to your jiu-jitsu game.
Immediate Online and App Access!
As soon as you place your order you’ll immediately be able to access The Kimura Roadmap in both the Netflix-style instructional area on Grapplearts and on the Grapplearts BJJ Master app for iOS and Android.

Who Is Stephan Kesting?

My name is Stephan Kesting. I’m a BJJ black belt and I’ve been doing jiu-jitsu for 30 years and other martial arts for over 40 years. I’ve been teaching jiu-jitsu for a long time, which is why my YouTube videos have over 71 million views and millions of people have visited my Grapplearts website.
The Kimura was one of the first submissions I’ve ever learned, and I’ve continued to refine and improve it my entire grappling career.
I’ve picked the brain of some of the top competitors in the world, dissected countless hours of competition footage, logged endless training sessions, and continuously worked on improving my teaching methodologies for this technique.
This instructional is me showing you everything I’ve learned about the Kimura in 30 years of grappling.
I’ve really put a lot of thought and field-testing into teaching this material, so I think it will be extremely useful for you!
Stephan Kesting
What Does This Instructional Cover Exactly?
This 12 volume, concept-based instructional is filmed with multiple cameras and is organised to make learning fast and easy.
Vol 1, Understanding the Kimura
- What Does “The Kimura is a Control Position” Mean?
- The 12 Core Kimura Positions
- The 3 Mechanisms That Finish the Kimura Submission
- The Primary Kimura Grips
- Secondary Kimura Grips
Vol 2, Kimura from Side Control

- Kimura vs Side Control Attacking the Wrist First
- Kimura vs Framing Side Control Attacking the Armpit First
- Kimura vs North-South
- Kimura vs Underhook Escape
- Kimura vs Arm-Over-Back Position
- Kimura vs a Very Defensive Posture
- Positioning for a Maximum Power Kimura
- Answers to Opponent Sitting Up and Getting Rolled
- Breaking Defensive Grips from Side Control
- Triple Attack Finishing Sequence
- Transitioning to the T Kimura
Vol 3, North-South Kimura

- North-South Kimura Positions
- The Primary Finish from the North-South Kimura Position
- North-South Kimura to Armbar
- North-South Kimura to Side Triangle Series
- North-South Kimura to Tarikoplata
Vol 4, Near Side Kimura

- What is a Near Side Kimura and Why is it so Important?
- Near Side Kimura Grips and Controls
- Troubleshooting the Near Side Kimura
- Getting to the Near Side Kimura
- Near Side Kimura Finishes and Transitions
Vol 5, Top Half Guard Kimura

- Half Guard Top Kimura vs Frame
- Rolling Kimura vs Posting Arm
- Kimura Counter vs Kimura from Bottom Half Guard
- Armbar Counter vs Kimura from Bottom Half Guard
- Backtake Counter vs Kimura from Bottom Half Guard
Vol 6, Bottom Half Guard Kimura
- The Context of the Bottom Half Guard Kimura
- Bottom Half Guard Kimura vs Guard Pass Attempt
- Bottom Half Guard Kimura vs Crossface Attempt
- Biceps Push Setup for the Bottom Kimura
- Bottom Half Guard Octopus Bait to Kimura
- 3 Grip Breaks from Bottom Half Guard Kimura
- Choi Bar Finish to the Half Guard Kimura
- Countering the Half Guard Kimura Roll Escape
- Hip Bump Recounter vs Hidden Hand Kimura Counter
- Kimura Rollunder with Inside Leg Knee Bump Assist
- Kimura Rollunder with Outside Leg Butterfly Hook Assist
- Half Guard Kimura Butterfly Sweep
- Swinging Kimura Backtake Series
- Swinging Kimura Backtake Cartwheel Followup
- Swinging Kimura Backtake Somersault Followup
- Recountering the Spinning Armbar Counter
- Recountering the Kimura Recounter vs the Half Guard Kimura
- The Critical Role of the Kimura in Back Control
- Key Details that Transform the Kimura Control from the Back
- Armbar to Bellydown Armbar Followup
- The 2 Main Triangles from Kimura Back Control
- Attacking with the Triangles from the Back
Vol 7, The Kimura from Back Control
- The Critical Role of the Kimura in Back Control
- Key Details that Transform the Kimura Control from the Back
- Armbar to Bellydown Armbar Followup
- The 2 Main Triangles from Kimura Back Control
- Attacking with the Triangles from the Back
Vol 8, The T Kimura
- The T Kimura: Grips, Legs, and Body Position
- Maintaining the T Kimura When Your Opponent Tries to Escape
- The Grand Unified Theory of T Kimura Attacks
- Attacks from Knee Over the Far Shoulder
- Attacks from Leg Over the Head
- Attacks from Leg over the Far Shoulder, Foot in the Far Armpit
- Attacks from Leg over the Far Shoulder, Foot in the Near Armpit
- Attacks from Leg over the Near Shoulder, Foot in the Far Armpit
- Attacks from Leg over the Near Shoulder, Foot in the Near Hip
- Attacks When Your Opponent Turns Towards You
- Attacks When Your Opponent Turns Away, Slides Up, or Slides Down
Vol 9, Closed Guard Kimura
- The Context for Closed Guard Kimuras
- Closed Guard Kimura Entries
- Closed Guard Kimura Grip Breaks
- Other Closed Guard Kimura Followups
Vol 10, Kimura-Based Guard Passing
- Do This Before Even Thinking About Using Kimura-Based Passes
- Rolling Over the Head vs an Elbow Post
- Rolling Over the Shoulder vs a Hand Post
- Attacking the Wrapping Arm
Vol 11, Kimura from Top Turtle
- Top Side Far Arm Kimura Turnover and Crucifix
- Top Side Far Arm Kimura to Foot-In-Hip Kimura
- Top Nearside Kimura Followups
Vol 12, Standing Kimura and Training Drills
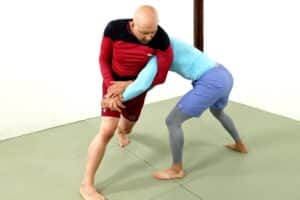
- Kimuras vs Single and Double Leg Takedowns
- Sakuraba-Style Kimuras Vs Opponent Behind You
- 7 Critical Games for Mastering the Kimura
Bonus Section, Kimura Offense

- 8 x additional bonus offensive strategies
Bonus Section, Kimura Defense
- 12 x additional bonus defensive strategies
Time-Limited Special Bonus!

The Kimura Roadmap is an amazing deal, but I want to make this a total no-brainer for you.
That’s why if you grab The Kimura Roadmap today I’ll also throw in The Black Belt Grappling Concepts Course for free. That’s 26 lessons on how to train and learn BJJ from a concepts-based point of view.
This will allow you to learn new techniques much quicker, have solutions for new situations, and increase your confidence on the mats.
Originally this course sold for $197, but today it’s yours free with your purchase of The Kimura Roadmap
Immediate Online and App Access!
The Kimura Roadmap and your bonus course will be immediately available on the Grapplearts site and the Grapplearts BJJ Master App.
Thanks, and good luck with your training,
Stephan Kesting