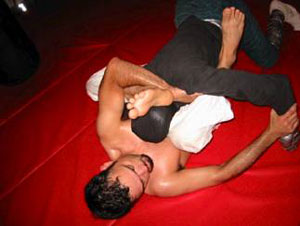
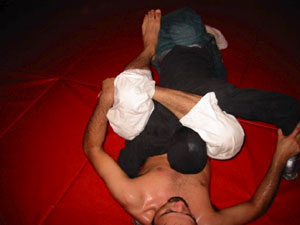
Grappling Logo 1
Submission Grappling, Brazilian Jiu-jitsu, Mixed martial arts, Wrestling, Judo, Sambo and more
Grappling Logo 2
Grapplearts Grappling - Building a Better Grappler
Grappling Logo 3
Home | Grappling Videos | Articles | Techniques | Featured Photo | About Us | School Database | Links | Contact
Grappling Logo 4
Eddie Bravo's Rubber Guard
"The Meathook"

FREE: A Top Coach Shares his Insights:

BJJ for MMA

To receive this free report and receive the Grappling Tips Newsletter enter your email below (find out more)

BJJ iPhone Application

Three Apps for the iPhone, iPad and iPod Touch, only $3.99 each!!

1: Grapplearts Submissions

2: Grapplearts Guard Sweeps

3: Grapplearts Pin Escapes

See also: Eddie Bravo's Rubber Guard Technique 2: "The NewSchool"


Here, with permission from Eddie 'Twister' Bravo, the man who submitted Royler Gracie with a triangle choke at Abu Dhabi 2003, is a step, by step breakdown of one of his rubberguard setups.
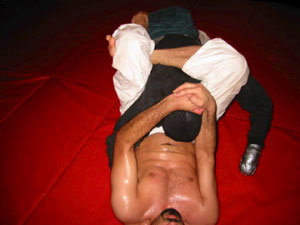
Eddie's partner in this demo is the Rooker dummy, made by Phil Hughes. Contact him at philhughes@cogeco.ca for pricing and ordering information

Eddie Bravo Triangle choke setup from the rubber guard  step 1 Step one: Hold the opponent's head down as tight as possible with your left arm
Rubber Guard by Eddie Bravo photo 2 Step Two: Shift your hips to the side, putting your left foot on your opponents right hip.
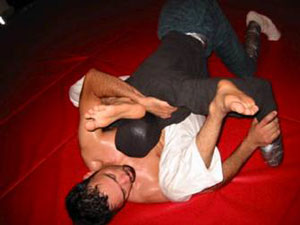
Eddie Bravo Triangle choke setup from the rubber guard  step 3

Step three: As fast as possible, pull your left leg up with your right arm.

Rubber Guard by Eddie Bravo photo 4 
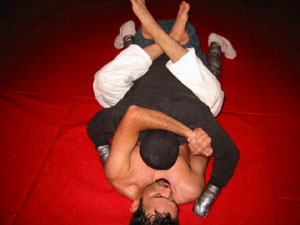
Step Four: Hold your opponents head down with your left leg and left arm, hooking his left armpit with your left hand tightly.
Rubber Guard by Eddie Bravo photo 5 Step Five: Control your opponent's left wrist with your right hand and slide your right knee up.
Rubber Guard by Eddie Bravo photo 6 
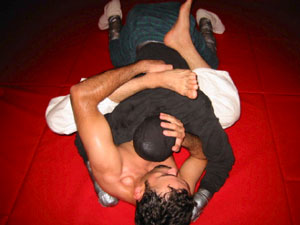
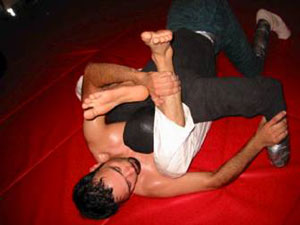
Step Six: Clear your right foot around your opponent's left arm.
Rubber Guard by Eddie Bravo photo 7

Step Seven: Grab a hold of your right ankle and begin to pull it across.
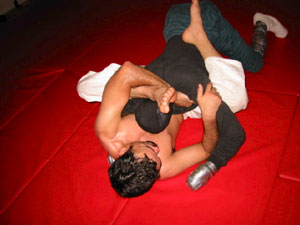
Rubber Guard by Eddie Bravo step 8 Step Eight: Pull your left ankle across your opponent's back for the triangle choke.
Eddie Bravo Triangle choke setup from the rubber guard  step 9 
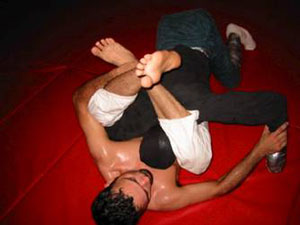
Step Nine: Pull your foot to tighten the triangle choke.
Eddie Bravo Triangle choke setup from the rubber guard  step 10 Step Ten: Don't worry about where your opponent's right arm is, just pull the head down as tight as possible. He WILL tap.


All materials & images Copyright 2002 to 2011, Stephan Kesting
Home Store Articles Techniques Photos About Us Schools Links Contact