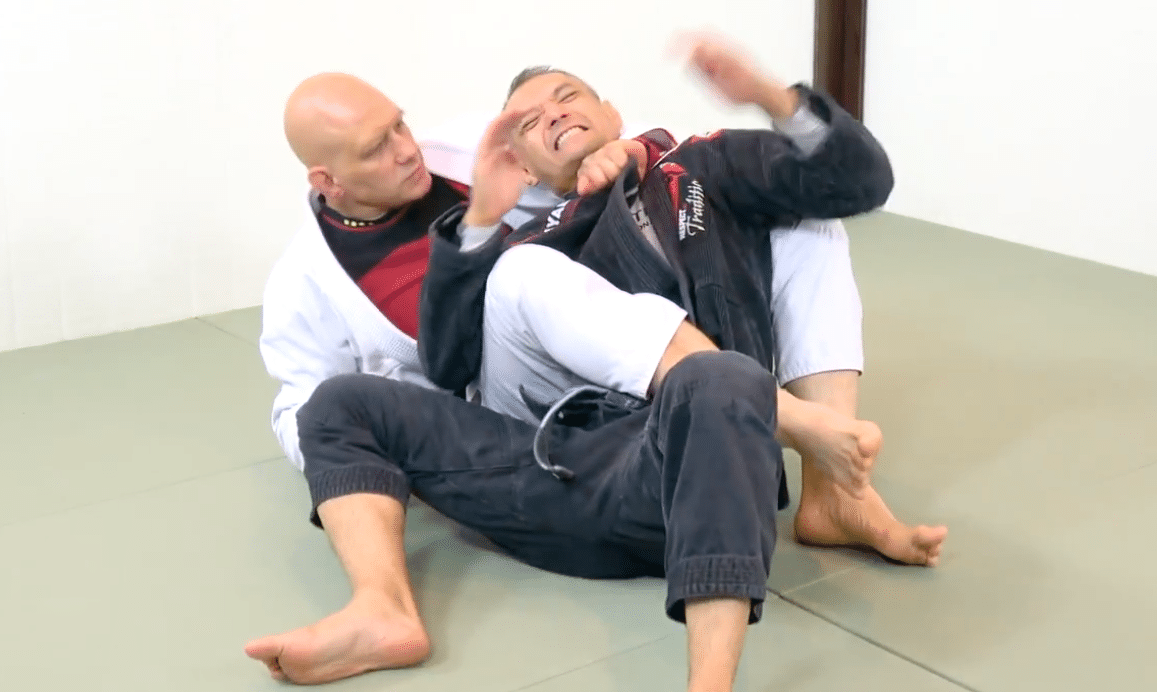
The bow and arrow choke is one of the most powerful chokes from the back in the entire BJJ repertoire. Many matches in the black belt division of the Mundials have ended with this choke, so you know it works!
This attack is called the ‘Bow and Arrow’ choke because when you apply it your opponent gets bent sideways into a bow shape, while you stay straight (i.e. an arrow).
Bending your opponent like this destroys his spinal alignment (or his ‘posture’ in the base-posture-structure model of BJJ), which makes it much more difficult to resist or escape!
At the same time, keeping yourself straight allows you to use your powerful posterior chain muscles (your glutes, hamstrings, spinal erectors, etc.) to make the choke super-powerful without having to rely on the strength of your arms.
This article is about defending the bow and arrow, but if you want a quick review of how to do the choke properly then check out the video below where Emily Kwok makes my head explode despite giving up almost 60 pounds!
OK, so now we’ve reviewed why the bow and arrow is such a powerful attack… and we understand why it’s so important to know how to escape it… so let’s get down to the nitty gritty!
Getting out of this choke involves some plate spinning (i.e. doing multiple things at the same time) but at it’s core is essentially a 4 step procedure….
Step 1: Slide Down and Stay Parallel!
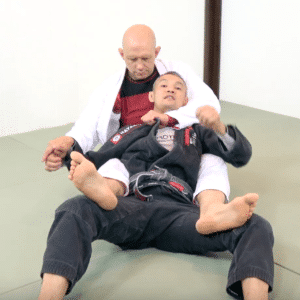
Assuming that your opponent has your back and his hand deep in your lapel it’s time to go into defense and escape mode!
First you want to slide your body down towards your feet.
This involves bringing your butt towards your heels while also keeping your hips off the ground to keep you heavier on his legs and make it harder for him to adjust to your movements.
But as we talked about above, much of the power of this choke comes from the fact that your opponent is in good alignment while you’re all twisted up with your spine kinked to the side.
The way he does this is by gripping your knee or, worse, hooking his arm behind your knee.
So you have to keep that leg away from him and actively use gripfighting to block his hand as it reaches down towards your leg.
Now it’s time for the next step…
Step 2: Get Your Head Into His Armpit!
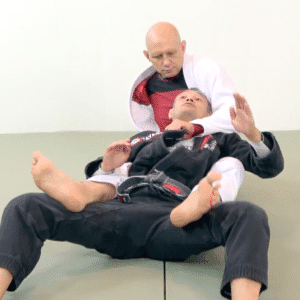
The next thing you need to do is get the top of your head into his armpit.
This changes the angle of his choke – instead of it going across your throat and against the sides of your neck it’s now pulling up, which is much less efficient.
And even more importantly it reduces the profile of your head. Ultimately you’re going to have to bring his arm over your head/face, so the less distance you need to lift his arm the better.
Step 3: Push His Elbow Up
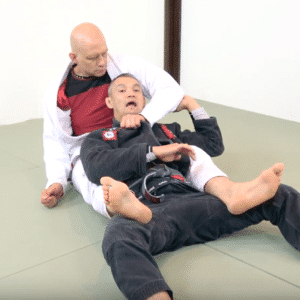
Next you’re going to find his elbow with your hand.
Resist the temptation to grab his sleeve – that’s a common choke defense but in this case you’re going for the longest, most powerful lever available to you.
Pushing at the elbow when his hand is anchored on your lapel will give you much more leverage than attempting to push his arm with a mid-forearm grip.
Step 4: Turn In and Get to the Top
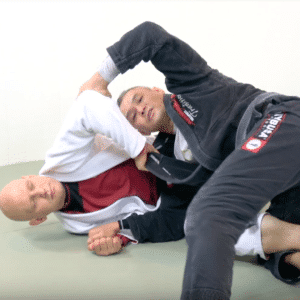
Finally you’re going to push UP on his elbow while turning IN to face him.
The pressure on his arm feels a little bit like a Kimura armlock – not enough to make most people tap out, but certainly enough to get his attention. And it allows you to lever his arm over your face and off of your neck!
Not only does this final step allow you to defend the choke, but you’ve also escaped the position; going from having an opponent on your back to being on top in his half guard is definitely a huge step up in the positional hierarchy of BJJ.
(This concept of positional hierarchy is discussed extensively in this resource on grapplearts here.)
The Entire Bow and Arrow Choke Escape on Video
We broke down this escape into text and pictures for your easy reference, but really it’s easies to see all the steps linked together in video (at least the first time).
That’s why we’ve shot a 4:05 video of this technique which you can check out below.
The bow and arrow choke is so powerful that you absolutely need an answer to it. It’s not going to work every time, but if you can tap out less often then that’s a victory in itself!
So check out the video below!
My 100% Free Guide to the Techniques of BJJ
BJJ can be a very complicated, very confusing martial art because there are so many different techniques and positions.
So which of the 1000+ techniques do you focus on first?
To answer this question I wrote a completely free guide to learning BJJ as fast as possible.
It’s called ‘The Roadmap for BJJ, and it’s yours free.
 In addition to the book you’ll ALSO get the most detailed, most informative BJJ training emails that anyone sends out.
Every day I get thank you emails for the tips, techniques and information sent out to my email list, so you’ll probably get a lot from them too.
But if I’m wrong, if you don’t like what I send out, then you can easily unsubscribe with a click by following the links at the bottom of every email I’ll ever send you.
So unsubscribing is quick, easy and permanent.
To get the FREE Roadmap for BJJ guide enter your best email address below and I’ll get you the information asap!
P.S. Thanks to my friend and training partner Ritchie Yip from Infighting MMA for taking the time to show us this awesome escape!
