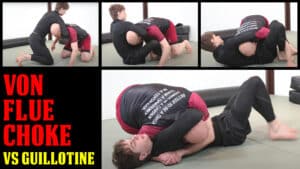
The guillotine choke is the second most popular submission in MMA (after the rear naked choke) and an omnipresent threat in no gi grappling and gi jiu-jitsu, so you need a solid guillotine defense game! But the only thing better than defending against a guillotine is reversing it and using his choke attempt to set up a submission of your own. That's where the Von Flue choke comes in! This … [Read more...]
Chokes
Four Lapel-Based Attacks from Side Control
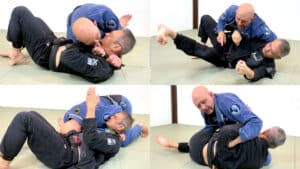
If you train BJJ, knowing some tricks with the lapels to attack your opponent can be very useful, so don't disregard the advantages the gi offers you. Some people don't like training with the gi. I have no problem with that if your only focus is no-gi competition; if that's you, then by all means, train specifically for your sport. But if self-defense is important to you, then you should … [Read more...]
The Step-by-Step Clock Choke
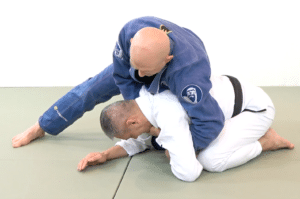
The Clock Choke Heard Round the World We're going to go through my favorite step-by-step method for how to do the clock choke, but first let's talk about a the first time I saw the clock choke and a match that changed jiujitsu... It was in 1998 when Royce Gracie squared off against the Carlson Gracie Wallid Ismael. At the time Royce was undefeated in 5 UFC events and, in my eyes at least, … [Read more...]
Step by Step D’Arce Choke vs the Half Guard
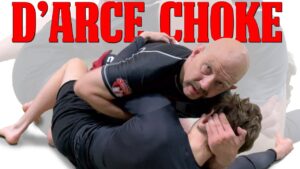
If someone has you in their half guard and they have a strong underhook you're in trouble; they're DEFINITELY thinking about taking your back, sweeping your, or setting up a submission like a triangle choke. A great weapon to shut all that nonsense down is the D'Arce Choke (also known as the no gi Brabo choke). This choke is an absolute staple of modern no gi grappling, and you have to know … [Read more...]
NEW INSTRUCTIONAL!! 30 Second Fight Finishes
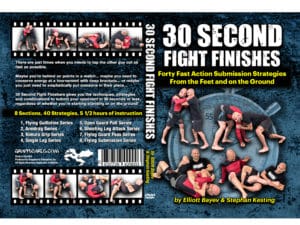
Elliott Bayev is one of the most detail-oriented instructors I've ever met. His first instructional with Grapplearts was The Spider Guard Masterclass, which many people called the best BJJ instructional they've ever seen. Elliott is now back with 30 Second Fight Finishes. In this instructional you'll learn the absolute fastest ways to end your match, regardless of whether you’re on … [Read more...]
How to Apply the Bow and Arrow Choke in Jiu-Jitsu
The bow and arrow choke is one of the highest percentage finishing techniques in all of jiu-jitsu. Statistically it's used to finish a very large number of matches at high level BJJ competition like the Mundials, the Pan-Ams, and more. But some ways of applying the bow and arrow are better than others. Some methods are tighter, some finishes are more powerful, and certain tweaks make it MUCH … [Read more...]
How to Build a Closed Guard System
Too many people end up in closed guard and try singular attacks. Armbar attack! Damn, that didn't work. Sweep attack!! Damn, that didn't work either. Take the back!!!! My opponent shut that down too... what am I doing wrong? The thing is that singular attacks (or, even worse, waiting for your opponent to make a mistake) might work at white belt level, but this sort of strategy just … [Read more...]
The Five Types of Triangle Choke You Need to Know
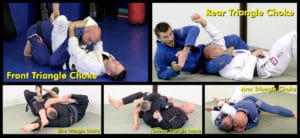
The triangle choke is one of the most powerful BJJ submissions. Thousands upon thousands of matches have been ended with it, including in the UFC and other MMA events. Knowing how to do the triangle choke properly is an absolute necessity for every grappler This choke originated in Japanese Ju-jutsu and was then incorporated into Judo in the early 1900's where it is known as sankaku-jime … [Read more...]
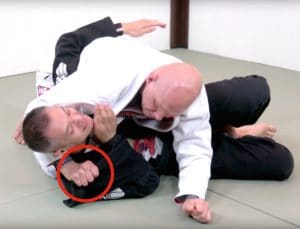
How To Do the North South Choke
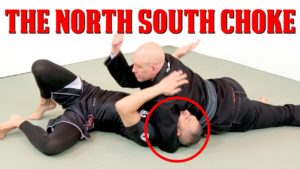
The north south choke is a powerful choke that you can apply from the top of sidemount or the north south position. This submission looks a bit like an upside-down guillotine choke but the mechanics of finishing the choke are quite different. Given that this technique works both with and without the gi I think everyone should experiment with it, at least enough to recognize when someone is … [Read more...]
The 6 Steps of a Good Submission
Did you know that there's an actual physics and biomechanics-based procedure that'll definitely help you tap out many more people in BJJ? At a high level there's so much more more to getting a choke or an armlock than simply seeing an opportunity and jumping on it. That approach rarely works against good people. Instead it's about gradually manoeuvring your opponent into worse and worse … [Read more...]
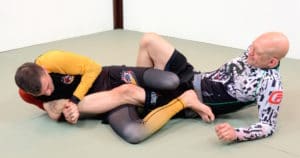
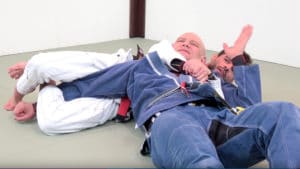
Back Attacks 7: The Most Powerful Chokes from the Back Position
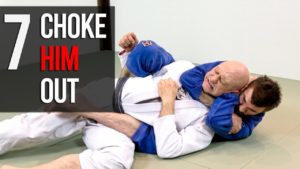
Rob Biernacki with the highest percentage chokes you can use when you're on someone's back in rear mount. This is part 7 in a series on the so-called 'weak side' of the back we're releasing on Youtube and is a small part of the Back Control module of the BJJ Formula instructional. You can get The Back Attacks Formula (including the NEW weak side material) in several different ways... 1) … [Read more...]
Back Attacks 6: How to Transition to the Crucifix from Rear Mount
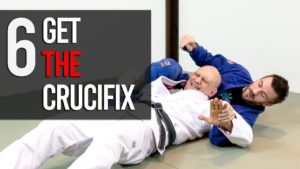
The crucifix is an absolutely terrible position to be caught in when you're doing BJJ, No Gi or MMA. Here's Rob Biernacki of BJJ Formula fame showing exactly how to apply the crucifix on your opponent!! This is part 6 in a series on the so-called 'weak side' of the back we're releasing on Youtube and is a small part of the Back Control module of the BJJ Formula instructional. You can get … [Read more...]
Back Attacks 5: How to Switch to an Armbar Submission When You’re on the Back!
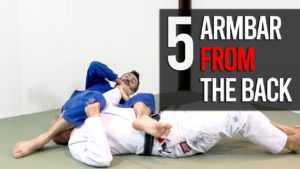
Many people are surprised to learn that the straight armbar is a reliable, high-percentage, and super-powerful submission, from the back when you're grappling in BJJ, No Gi or MMA. Here's Rob Biernacki of BJJ Formula fame showing exactly how to do that. This is part 5 in a series on the so-called 'weak side' of the back we're releasing on Youtube and is a small part of the Back Control module … [Read more...]
Back Attacks 4: How to Systematically Apply the Triangle Choke from Rear Mount
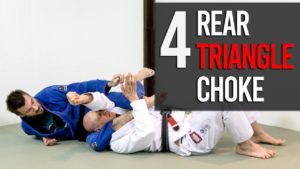
The rear triangle choke, also known as 'ura sangaku' is a fantastic way to submit your opponent when you're on his back in rear mount. Here's Rob Biernacki of BJJ Formula fame showing exactly how to do that. This is part 4 in a series on the so-called 'weak side' of the back we're releasing on Youtube and is a small part of the Back Control module of the BJJ Formula instructional. You can get … [Read more...]
Defending and Escaping When Someone is On Your Back!

Having someone on your back in rear mount is an absolutely terrible situation. It doesn't matter if you're doing BJJ, no gi submission grappling, MMA, or are in a self defense situation. When someone is behind you with the hooks in and his arms locked in the seatbelt position then you're really very close to getting choked into a drooling mess. There's a reason that being caught in rear … [Read more...]
The BJJ Crucifix Position and Your Best Submission Options From There
The crucifix is a very important position in BJJ and No Gi grappling. Like the rearmount the crucifix puts you behind your opponent where all your weapons are pointed at him and he's essentially unable to launch any offense against you. Unlike the rearmount, however, the crucifix ties up both of his arms so that defending your choke and armlock attacks becomes even harder for him. So it’s … [Read more...]
The ‘Soft One, Hard Two’ BJJ Gripfighting Strategy
Have you ever heard the story about the old bull and the young bull, standing at the top of a hill, watching some cows? The young bull turns to the older bull and says, "Hey, let's run down there and each make sweet, sweet love to one of those cows!" The older bull retorts, "Why don't we just walk down there, nice and slow, and make sweet, sweet love to ALL the cows?" The original … [Read more...]
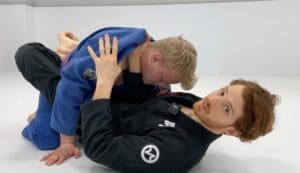
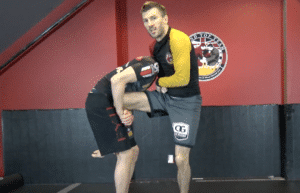
The Strong and Weak Sides of the Guillotine Choke (And How to Use Them for Offense and Defense)
OK, today we're going to talk about something that's both very simple and incredibly important. I've explained this to SO many grapplers over the years it's not even funny, and most of the time the reaction is a "Doh! I should have known that!!!" Here's what I'm talking about... The guillotine choke has a strong side and a weak side. Attacking with a strong sided guillotine is MUCH … [Read more...]
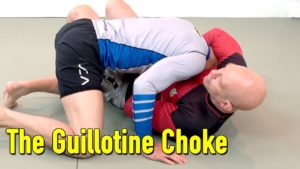
The Ultimate Guide to the Guillotine Choke in BJJ
The guillotine choke is a powerful submission in BJJ, no gi grappling, and mixed martial arts. At first glance it seems like a simple submission - you just wrap your opponent's neck with your arms, pull up and squeeze, right? Not so fast... There are a LOT of subtleties that you need to master before this submission starts being reliable for you, especially if you don't spend 4 hours a … [Read more...]
Podcast Episode 113 – A Close Call, and Avoiding Injuries!

The other day I almost tore a partner’s ACL off the bone, which would have required him to have surgery and many months of rehabilitation. What happened exactly? I was more experienced and a bit bigger than my training partner that day and we were doing some no gi sparring. Because of the experience discrepancy I was hyper-focusing on a couple of very specific positions, namely Ashi … [Read more...]